How to Properly Package and Ship a Screen Printed Gig Poster: A Comprehensive Guide
Screen printed gig posters are not just promotional tools; they are collectible art pieces. Whether you're an artist sending out your own work or a seller dispatching items to buyers, ensuring that these posters arrive in pristine condition is crucial. Here’s a step-by-step guide on how to properly package and ship a screen printed gig poster to ensure it reaches its destination in perfect shape.
1. Gather Your Materials
Before you start packing, make sure you have the following materials on hand:
- Protective Plastic Sleeves: These will keep your poster safe from moisture and dust.
- Backing Boards: Sturdy boards will prevent the poster from bending or folding.
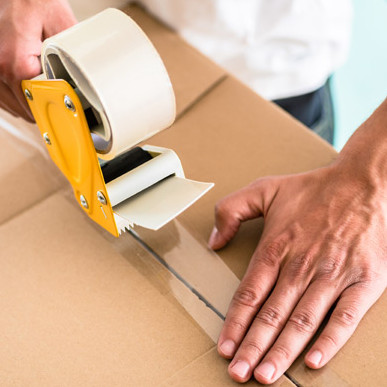
- Packing Tape: For sealing the package.
- Bubble Wrap: To provide extra cushioning.
- Shipping Tubes or Rigid Mailers: Depending on your shipping method, you'll need either tubes for rolled posters or flat mailers for posters that are kept flat.
- Address Labels and Shipping Documentation: Ensure you have accurate addresses and necessary labels.
2. Prepare the Poster
For Rolled Posters:
- Place the Poster in a Protective Sleeve: Slide your poster into a clear, protective plastic sleeve. This step helps protect against moisture and dust.
- Add a Backing Board: Insert a piece of rigid backing board into the sleeve with the poster. This will provide support and prevent the poster from bending.
- Roll the Poster Carefully: Gently roll the poster with the printed side facing inward to avoid creasing the print. Ensure the roll is tight but not so tight that it causes stress on the paper.
For Flat Posters:
- Place the Poster in a Protective Sleeve: As with rolled posters, use a protective plastic sleeve.
- Insert a Backing Board: Place the backing board behind the poster within the sleeve. Ensure the board is slightly larger than the poster to offer complete protection.
- Secure the Poster: Use a small piece of tape to secure the poster to the backing board if necessary.
3. Choose Your Shipping Container
For Rolled Posters:
- Use a Shipping Tube: Place the rolled poster into a shipping tube, ensuring it fits snugly but not too tight.
- Add Cushioning: Fill any extra space in the tube with bubble wrap or packing paper to prevent movement during transit.
- Seal the Tube: Close and seal the ends of the tube with packing tape. Make sure the ends are securely fastened.
For Flat Posters:
- Use a Rigid Mailer: Insert the poster (with backing board) into a rigid mailer.
- Add Extra Protection: Place additional pieces of cardboard or foam board in the mailer to add rigidity and prevent bending.
- Seal the Mailer: Close the mailer securely with packing tape, making sure all edges are properly sealed.
4. Label and Ship
- Attach Address Labels: Clearly write or print the recipient’s address and your return address on the package. For shipping tubes, labels should be placed along the length of the tube.
- Include Shipping Documentation: Attach any necessary shipping documentation, including tracking numbers and delivery confirmation.
- Choose a Reliable Carrier: Select a reputable shipping carrier and choose a shipping option that provides tracking and insurance. This is especially important for high-value or collectible posters.
5. Final Checks
Before sending off your package, double-check that:
- The poster is securely packaged with no movement inside the container.
- All labels and documentation are correctly filled out and attached.
- The package is sealed properly and ready for transit.
By following these steps, you can ensure that your screen printed gig posters are well-protected and arrive at their destination in excellent condition. Proper packaging not only preserves the quality of the poster but also enhances the recipient’s experience, making it a rewarding part of the art and collectibles community.